
Brother P-Touch Label Maker Manual: A Comprehensive Guide
Brother P-Touch label makers, like the PT-65, are popular for organization. This manual provides a detailed guide, covering setup, operation, troubleshooting, and resources.
Understanding the device ensures efficient label creation, from basic text input to advanced template usage.
Brother P-Touch label makers represent a long-standing commitment to providing users with efficient and versatile labeling solutions. Originating as a practical tool for home and office organization, the series has evolved significantly, incorporating advanced features while maintaining user-friendliness. These devices cater to a broad spectrum of needs, from simple address labels and file organization to more complex applications like asset tracking and cable identification.
The core strength of the P-Touch series lies in its thermal transfer printing technology. This method ensures durable, legible labels resistant to fading, smudging, and common environmental factors. Unlike inkjet or laser printers, P-Touch machines don’t require ink, utilizing heat to transfer resin onto the label tape. This contributes to lower long-term operating costs and reduced maintenance.
Over the years, Brother has introduced numerous models within the P-Touch family, each designed with specific features and capabilities. From compact, portable models ideal for on-the-go labeling to more robust desktop units offering expanded functionality, there’s a P-Touch label maker to suit virtually any requirement. The series is also known for its compatibility with a wide range of tape types, including laminated tapes, flexible tapes, and specialized tapes for various industrial applications.
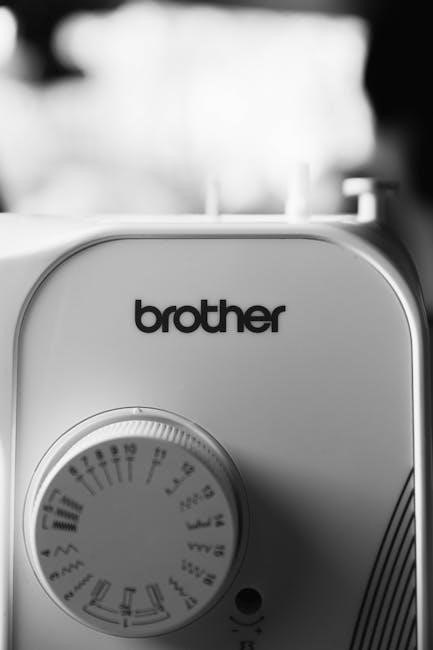
Understanding the PT-65 Model
The Brother PT-65 is a classic, handheld electronic label maker, renowned for its simplicity and reliability. As a foundational model within the P-Touch series, it provides essential labeling functionality in a compact and portable design. This model is particularly well-suited for basic home and small office tasks, such as organizing files, labeling storage containers, and creating address labels.
The PT-65 features a QWERTY keyboard layout, facilitating relatively quick and intuitive text input. It utilizes a simple LCD screen for previewing labels before printing. The device operates using either AA batteries or an optional AC adapter, offering flexibility in power options. It accepts a variety of Brother “TZe” tape cassettes, allowing users to choose from different tape widths, colors, and materials.
While lacking some of the advanced features found in newer P-Touch models – such as built-in fonts, symbols, and automatic power-off – the PT-65 excels in its straightforward operation. Its user manual, often available online, provides detailed instructions on all functions. It’s a dependable choice for those seeking a no-frills, cost-effective labeling solution.
Initial Setup and Powering On
Before first use of your Brother PT-65 label maker, a few simple steps are required for initial setup. Begin by removing the battery compartment cover located on the back of the device. Insert six AAA batteries, ensuring correct polarity as indicated by the diagram inside the compartment. Alternatively, you can connect the optional AC adapter to the DC IN jack for continuous power.
To power on the PT-65, press the power button, typically located on the top or side of the unit. The LCD screen will illuminate, displaying a self-test pattern and then the input mode. If the screen doesn’t activate, double-check the battery installation or AC adapter connection. A low battery indicator will appear on the screen when battery power is insufficient.
Familiarize yourself with the basic screen display. It will show the cursor, indicating where text will be entered, and any selected font or formatting options. The initial setup is complete once the device powers on successfully and displays the ready-to-use input screen. Refer to the manual for specific button functions.
Installing Batteries and AC Adapter
The Brother P-Touch PT-65 offers flexible power options: battery or AC adapter. To install batteries, locate the battery compartment on the device’s underside. Slide off the cover and insert six AAA-sized alkaline or heavy-duty batteries, strictly adhering to the polarity (+ and -) markings inside the compartment. Incorrect installation will prevent the label maker from powering on.
For continuous operation, utilize the optional AC adapter. Connect the adapter’s plug into a standard wall outlet and then insert the adapter’s DC plug into the DC IN jack on the label maker. The AC adapter will override battery power when connected, conserving battery life.
Important notes: Remove batteries if the device will not be used for an extended period to prevent potential leakage. Do not mix old and new batteries. Always use the specified battery type. The AC adapter is not included with all models and may need to be purchased separately. Ensure the adapter voltage matches your local power supply.
Keyboard Layout and Functions
The Brother P-Touch PT-65 features a QWERTY-style keyboard optimized for efficient label text input. Familiar letter keys allow for quick typing, while dedicated function keys streamline label creation. The ‘Shift’ key accesses secondary characters and symbols. The ‘Caps Lock’ key toggles between uppercase and lowercase input.
Key functions include ‘Print Preview’ for visualizing the label before printing, ‘Clear’ to erase entered text, and ‘Backspace’ to delete characters. The ‘Space’ bar inserts spaces, and the ‘Enter’ key confirms selections or moves to the next editing field. Dedicated keys for symbols and frames provide easy access to decorative elements.
The ‘Label’ key initiates the printing process, while the ‘Cut’ key automatically trims the label after printing. The ‘Power’ key turns the device on and off. Understanding each key’s function is crucial for navigating the label maker’s interface and creating customized labels effectively. Refer to the diagram within this manual for a visual representation of the keyboard layout.
Navigating the LCD Screen
The Brother P-Touch PT-65 utilizes a clear LCD screen for displaying label previews, editing options, and menu selections. The screen’s interface is navigated using the directional arrow keys – Up, Down, Left, and Right. These keys allow you to scroll through text, fonts, symbols, and settings.
The ‘OK’ button confirms selections and advances to the next step in the label creation process. The ‘Cancel’ or ‘Back’ button returns to the previous screen or cancels an operation. The LCD screen displays icons representing various functions, such as font style, label length, and print settings.
A cursor indicates the current editing position within the text field. The display also shows the remaining characters allowed for the selected tape width. Pay attention to the screen prompts and icons to understand the available options and navigate the menu system efficiently. Familiarizing yourself with the LCD screen’s layout is essential for customizing and printing labels.

Creating Your First Label
To create your first label with the Brother P-Touch PT-65, begin by powering on the device and ensuring a tape cassette is correctly installed. Use the keyboard to input your desired text. The LCD screen will display a preview of your label as you type. Utilize the arrow keys to position the cursor and make corrections.
Once the text is entered, navigate the menu to select your preferred font style, size, and any desired symbols or frames. Adjust the label length and cut settings according to your needs. Preview the final label design on the LCD screen before printing.
Press the ‘Print’ button to begin the printing process. The label maker will automatically advance the tape and cut it to the specified length. Experiment with different fonts and settings to personalize your labels. This initial practice will familiarize you with the basic workflow and unlock the full potential of your P-Touch.
Text Input Methods
The Brother P-Touch PT-65 offers several text input methods for creating labels. The primary method is the QWERTY keyboard, allowing direct typing of letters, numbers, and symbols. Utilize the ‘Shift’ key to access alternate characters and uppercase letters. The ‘Space’ bar inserts spaces between words, and the ‘Backspace’ key deletes characters.
For frequently used phrases or addresses, consider utilizing the memory function to store and recall them quickly. This saves time and ensures consistency. The label maker also supports symbol insertion via a dedicated menu. Browse through categories to find the desired symbol and add it to your label.
Some models may offer PC connectivity for label design and printing via software. This allows for more complex layouts and importing data. Familiarize yourself with these input options to streamline your labeling process and maximize efficiency with your P-Touch device.
Font Styles and Sizes
The Brother P-Touch PT-65 label maker provides a range of font styles and sizes to customize your labels. Access the font menu to cycle through available fonts, including standard, bold, italic, and outlined options. Experiment with different styles to achieve the desired look and readability.
Font size is adjustable, typically offering small, medium, and large settings. Consider the label width and viewing distance when selecting a font size. Larger fonts are ideal for prominent labels, while smaller fonts are suitable for detailed information on narrow tapes. Preview the label before printing to ensure the font size is appropriate.
Some models offer additional font effects, such as shadow or underline. Explore these options to further enhance your label designs. Remember that certain fonts and effects may consume more memory or tape length. The P-Touch allows for creative expression while maintaining clear and professional-looking labels.
Symbol and Frame Selection
The Brother P-Touch PT-65 enhances label visibility and organization with a built-in library of symbols and frames. Access the symbol menu to browse various icons representing common items, warnings, or categories. These symbols add visual cues, making labels easier to understand at a glance.
Frames provide a decorative border around your text, adding a professional touch. Choose from a selection of frame styles, including simple boxes, banners, and more elaborate designs. Frames can highlight important information or simply enhance the aesthetic appeal of your labels.
Combining symbols and frames allows for highly customized labels. Experiment with different combinations to create unique designs that meet your specific needs. Consider the label’s purpose and audience when selecting symbols and frames. The P-Touch offers a versatile way to create visually appealing and informative labels.
Preview your label before printing to ensure the chosen elements complement the text and overall design.
Label Length and Cut Settings
Precise label creation with your Brother P-Touch PT-65 relies on mastering label length and cut settings. The device allows you to specify the exact length of each label, preventing wasted tape and ensuring a clean, professional finish. Access the length setting through the device’s menu, typically measured in millimeters or inches.
The auto-cut function is a key feature, automatically trimming the label after printing. You can adjust the cut setting to match the desired label size. Some models offer a ‘half-cut’ option, leaving a small portion of the backing paper attached for easier peeling.
Experiment with different length settings to find the optimal size for your text and symbols. Always preview the label before printing to confirm the length and cut are accurate. Incorrect settings can result in incomplete labels or wasted tape. Proper adjustment maximizes efficiency and label quality.
Refer to the manual for specific instructions on accessing and modifying these settings on your P-Touch model.
Tape Cassette Installation
Installing a tape cassette correctly is fundamental to operating your Brother P-Touch PT-65 label maker. Begin by locating the tape compartment, usually on the underside of the device. Gently lift the compartment cover to reveal the tape installation area.
Ensure the cassette is oriented correctly; most cassettes have a specific direction for insertion. The tape spindle should face towards the print head. Carefully insert the cassette into the compartment until it clicks into place. A properly installed cassette will sit flush and secure.
After installation, the P-Touch may automatically detect the tape type. If not, you may need to manually select the tape width and material through the device’s menu. Incorrect tape settings can lead to poor print quality or damage to the print head.

Always use genuine Brother tape cassettes for optimal performance and to avoid potential issues. Refer to your manual for detailed diagrams and troubleshooting tips regarding tape installation.
Compatible Tape Types
The Brother P-Touch PT-65 label maker supports a variety of tape cassettes, offering flexibility for diverse labeling needs. Commonly compatible types include laminated TZe tapes, known for their durability and resistance to water, chemicals, and fading. These are ideal for indoor and outdoor applications.
Standard TZ tapes are suitable for general-purpose labeling, while specialty tapes cater to specific requirements. These include high-tack tapes for uneven surfaces, extra-strong adhesive tapes for challenging materials, and fluorescent tapes for enhanced visibility.
Brother also offers fabric tapes for ironing onto clothing or fabric items, and metallic tapes for a decorative touch. Tape widths range from 3.5mm to 12mm, accommodating different label sizes. Always check the P-Touch manual for a complete list of compatible tape types and widths.
Using non-genuine or incompatible tapes may damage the print head or result in poor print quality. Prioritize genuine Brother tapes to ensure optimal performance and longevity of your label maker.
Printing Labels: A Step-by-Step Guide
Printing labels with your Brother P-Touch PT-65 is straightforward. First, ensure a compatible tape cassette is correctly installed and the power is on. After creating and editing your desired label text, preview it on the LCD screen to confirm accuracy.
Next, adjust the label length and cut settings according to your needs. Use the dedicated buttons to specify the desired length and whether to automatically cut the label after printing. Press the “Print” button to initiate the printing process.
The P-Touch will automatically feed the tape, print your label, and, if enabled, cut it cleanly. Gently peel the label from its backing and apply it to the desired surface. For continuous labels, disable the auto-cut function and manually cut the tape at the desired intervals.
Always test a small label first to verify print quality and adhesion. Refer to the manual for specific instructions on utilizing advanced features like templates or barcodes during the printing process.
Troubleshooting Common Issues
Encountering problems with your Brother P-Touch? Several common issues have simple solutions. If the label maker doesn’t power on, check the batteries or AC adapter connection. Ensure the batteries are correctly installed and have sufficient charge, or that the adapter is securely plugged in.
For printing errors, verify the tape cassette is properly installed and the tape type is compatible. If the print is faint or missing, the print head may need cleaning (see the ‘Cleaning the Label Maker’ section). Error messages on the LCD screen indicate specific problems; consult the ‘Error Messages and Their Meanings’ section for details.
If keys are unresponsive, try resetting the device by removing the batteries for a few minutes. Jammed tape can often be cleared by carefully opening the tape compartment and removing the obstruction. If issues persist, consult the online resources or support channels for further assistance.
Regular maintenance and careful operation can prevent many common problems, ensuring your P-Touch continues to function reliably.
Error Messages and Their Meanings
Brother P-Touch label makers utilize error messages to diagnose issues. “Error” or a flashing display often indicates a problem with the tape cassette – ensure it’s correctly installed and the tape type is compatible. A “Jam” message signifies a tape obstruction; carefully open the compartment and remove any tangled tape.
“Low Battery” prompts battery replacement or AC adapter use. “Print Head” errors suggest a cleaning is needed, or potentially a replacement if cleaning doesn’t resolve the issue. A message indicating “Memory Full” means you’ve reached the label storage limit; delete existing labels to create new ones.
Less common errors might relate to internal malfunctions. Refer to the Brother support website or manual for specific codes. Documenting the error message before seeking help can expedite the troubleshooting process. Understanding these messages empowers users to quickly address problems and maintain optimal label maker performance.

Always consult the official Brother documentation for the most accurate and up-to-date error code definitions.
Replacing the Print Head
Brother P-Touch print heads degrade over time, leading to faded or incomplete prints. Replacing the print head restores label quality. First, power off the label maker and open the tape compartment. Gently remove the existing print head – it’s usually held in place by a small latch or clip.
Carefully insert the new print head, ensuring it clicks securely into position. Avoid touching the thermal element of the print head, as oils from your skin can affect performance. Close the tape compartment and power on the device.
Perform a test print to verify the new print head is functioning correctly. If the print quality remains poor, double-check the installation and ensure you’re using compatible tape. Brother recommends periodic print head replacement based on usage frequency.
Genuine Brother replacement print heads are recommended for optimal performance and to avoid damaging the label maker. Refer to your model’s manual for specific instructions and part numbers.
Cleaning the Label Maker
Brother P-Touch label makers require occasional cleaning to maintain optimal performance. Dust and debris can accumulate inside the tape compartment and around the print head, affecting print quality. Always power off the device and remove the batteries or AC adapter before cleaning.
Use a soft, dry cloth to wipe down the exterior of the label maker. For the tape compartment, gently remove any tape residue or dust with a cotton swab lightly dampened with isopropyl alcohol. Avoid using excessive liquid, as it could damage internal components.
Crucially, do not directly touch the print head with liquids or abrasive materials. A dry, lint-free cloth is best for gently cleaning the print head surface. Regular cleaning prevents build-up and ensures clear, consistent label printing.
Brother recommends cleaning the label maker every few months, or more frequently with heavy use. Proper maintenance extends the life of your P-Touch and guarantees reliable operation.
Memory Functions and Saving Labels
Brother P-Touch label makers often feature memory functions, allowing you to store frequently used labels and text formats. This eliminates the need for repeated input, saving time and effort. The PT-65 model, and similar versions, typically offer a limited memory capacity for storing label designs.
To save a label, after creating and editing your desired text and formatting, utilize the “Save” or “Memory” function on the device. The manual will detail the specific button sequence for your model. You can usually assign a number or name to each saved label for easy retrieval.
Importantly, saved labels are retained even when the device is powered off. This feature is particularly useful for repetitive labeling tasks, such as organizing files or identifying cables. You can recall saved labels and modify them as needed.
Brother recommends periodically reviewing and deleting unused saved labels to maximize available memory. Refer to your P-Touch manual for detailed instructions on memory management and label saving procedures.
Advanced Features: Templates and Patterns
Brother P-Touch label makers extend beyond basic text labeling with advanced features like pre-designed templates and decorative patterns. These enhance label aesthetics and functionality, offering professional-looking results for various applications.
The PT-65 and newer models include a library of built-in templates for common labeling needs – address labels, file folders, CD/DVD cases, and more. Access these through the device’s menu, selecting a template that suits your purpose. You can then customize the template with your specific text.
Beyond templates, P-Touch offers a range of decorative patterns and borders to add visual appeal. These patterns can frame your text or create unique label designs. Experiment with different combinations to achieve the desired look.
Furthermore, some models allow importing custom templates via software or SD card. Consult your Brother label maker’s manual for detailed instructions on accessing, utilizing, and customizing templates and patterns. These features elevate your labeling projects beyond simple text.

Using the Auto Power Off Function
Brother P-Touch label makers, including the PT-65, incorporate an auto power off function to conserve battery life and reduce energy consumption. This feature automatically shuts down the device after a period of inactivity, preventing unnecessary battery drain when not in use.
The default auto power off time is typically set to approximately 5 minutes, but this can often be adjusted through the device’s settings menu. Users can choose from various time intervals or disable the function entirely, depending on their preferences and usage patterns.

To access the auto power off settings, navigate to the “Settings” or “Menu” option on the P-Touch’s LCD screen. Locate the “Auto Power Off” or similar setting and select your desired time interval or disable the feature. Refer to your specific model’s manual for precise instructions.
Activating the auto power off function is a simple yet effective way to extend battery life and promote responsible energy usage. It ensures your Brother label maker is ready when you need it, without wasting power when idle.
Safety Precautions and Maintenance
Brother P-Touch label makers are designed for safe and reliable operation, but adhering to certain precautions is crucial. Always use the provided AC adapter or recommended batteries to avoid damaging the device. Do not expose the label maker to extreme temperatures, humidity, or direct sunlight.
When replacing tape cassettes or batteries, ensure the device is powered off. Avoid forcing any components, as this could cause damage. Keep the label maker clean by wiping it with a soft, dry cloth; Do not use abrasive cleaners or solvents.
Regular maintenance extends the lifespan of your P-Touch. Periodically clean the print head to remove any accumulated dust or debris, ensuring clear and consistent print quality. Refer to the manual for specific cleaning instructions.
Never attempt to disassemble or repair the label maker yourself. Contact Brother customer support for assistance with any technical issues. Following these safety guidelines and maintenance tips will ensure years of trouble-free operation.
Where to Find Additional Resources and Support
Brother provides a wealth of resources to support your P-Touch label maker experience. The official Brother website (https://www.brother-usa.com/) offers downloadable manuals, FAQs, and troubleshooting guides for various models, including the PT-65.
Online forums and communities dedicated to P-Touch label makers can be invaluable for finding solutions to common issues and sharing tips with other users. YouTube hosts numerous tutorial videos demonstrating various features and techniques.
For direct assistance, Brother customer support is available via phone, email, and live chat. Their knowledgeable representatives can provide personalized guidance and resolve technical problems. You can find contact information on the Brother website.
User manuals for the UK version of the PT-65 are also available online, offering specific instructions for that region. Remember to have your model number handy when seeking support to ensure accurate assistance. Brother is committed to providing comprehensive support for its products.